Chain 150 plus 3 chains.
Row1. SC in the 4th chain from the hook.* Chain 1, skip 1 and SC in the next Chain*. Repeat all the way around. Ending with SC on the last Chain. Chain 2. Turn. This is how it looks like.
Row2. SC in Chain 1 space. *Chain 1, and SC in Chain 1 space*. Repeat till end, ending with SC in beginning 3 Chains. Chain 2. Turn.
Row3. SC in Chain 1 space. *Chain 1, and SC in Chain 1 space*. Repeat till end, ending with SC in Chain 2. Chain 2. Turn.
Repeat Row 3 until you reached to Row 10.
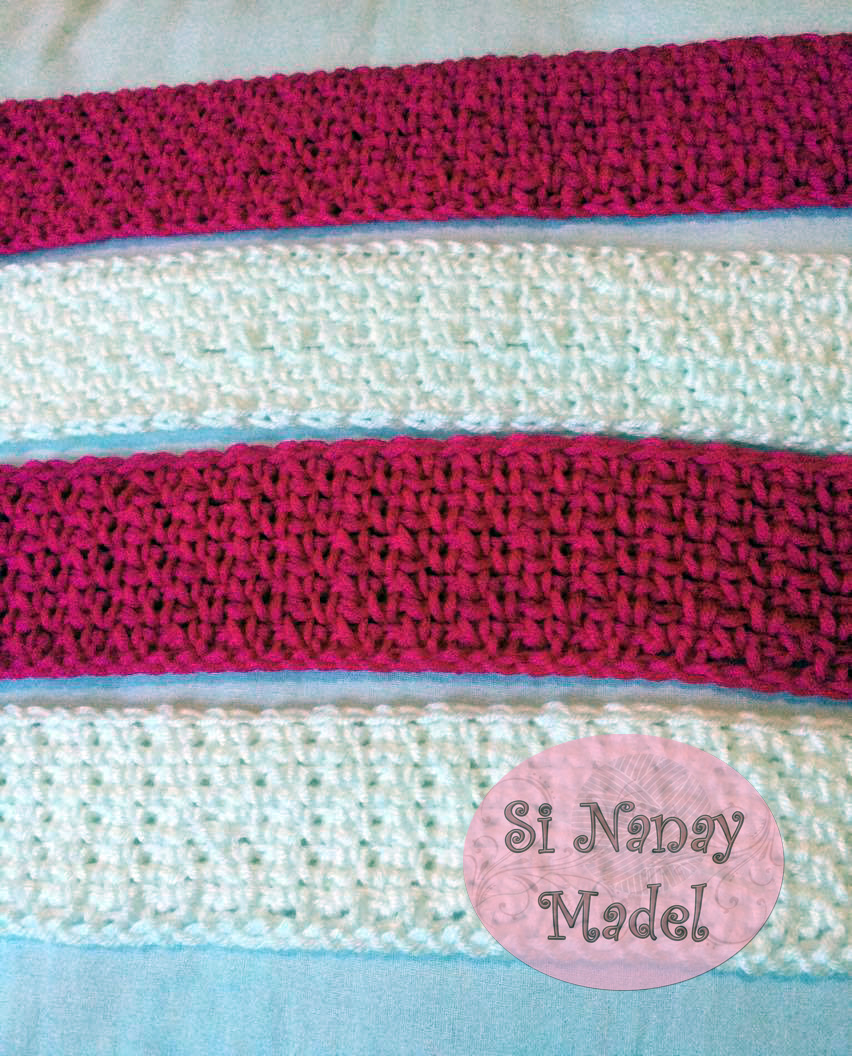
Make 4 of this. Two in each color of your choice.
The let's start weaving your scarf.
Just take a look on the pictures below. And see the flow of how to weave your scarfie.
Then Fold your scarfie in half.
And sew each end together. Same color together.
My joining does not so pretty. But it does not matter at all. It can't bee seen when you wear your scarfie.
And as you can see, I have an updated logo already. Hope you like it. From this time on. This will be my official logo. I have yet to change EVERY SINGLE picture here that belongs to me and put that logo there. That's a lot of work! Hope I can do that ASAP.
So that's it. I hope you all learn something and enjoy this
post. If you have any questions, comments or suggestion just leave a message on
the comment box and I will gladly answer them. Thank you and God bless!
xoxo
Nanay Madel
Don't forget to share on facebook, pinterest , twitter and
more... Please bear with my pictures, I just took them using my phone.
Thanks!
**Please do
not copy and post this pattern and claim it as your own. Please do not
re-publish all photos from this blog as your own. You may make and sell
products from my pattern. Please also link back to my post. Any link back will
be much, much appreciated.Thank you very much. **
I always
make sure to share also because I learn crochet for free and I got all of my patterns
from all over the internet from some very generous bloggers. So please also
click the links and support the bloggers.
Been dying to make a crochet curtain, but I haven't started yet. Here are some of my favorites around the web. This are beautiful curtains and also all patterns are free as of writing.
Colorful curtain by Ioana van Deurzen - It's pretty. This is good for your kitchen or dining area. Actualll almost all of the curtains of this post are good for your kitchen or dining area.
Flower Power Valance by Once Upon A Pink Moon. This is so popular and I could not wonder why. It is so beautiful and the colors are vibrant. Good for the kitchen also.
Big Bold Chevron Curtain by Moogly. Tamara is one of my favorite crocheter. I love her blog and I love her works. This curtain is so easy to make and can be actually used anywhere in you home.
Bernat Blocks-In-Blocks Curtains by Yarnspirations. This is nice and delicate. Wish I have so many time in my hand that I can make more of this.
Daisy Valance Design by Diane Stone for Crochet Magazine. This could look so nice even if your kitchen is painted white. I love white kitchen plus white curtains.
There are actually so many beautiful patterns around the web. And so many of them are for free. There are so many generous designers, they are one of the reasons why I share what I do here in my blog. I am inspired by those who share their beautiful creation for free. All pictures used here in this post is not mine. I do not own them. Click all the links to visit each blogger/contributor.
So I hope you all enjoy this post and learn something.
xoxo
Nanay Madel
Don't
forget to share on facebook, pinterest , twitter and more... Please
bear with my pictures, I just took them using my phone. Thanks!
**Please do not copy and post this pattern and claim it as your own.
Please do not re-publish all photos from this blog as your own. You may
make and sell products from my pattern. Please also link back to my
post. Any link back will be much, much appreciated.Thank you very much.
**
I always make sure to share also because I learn crochet for
free and I got all of my patterns from all over the internet from some
very generous bloggers. So please also click the links and support the
bloggers.
This is a combination of a Purse for your Ipad or Tablet and a cellphone pouch. I thought of making a real purse but the purse turn out to be smaller and slimmer so I guess only an Ipad or Tablet will be able to fit in here. I used a special stitch on this project I really don't know what to call that stitches. I kept on searching this
on the internet. I found out from Interunet.com about this and she
calls it Wildflower stitches. But when I search it on the web about wildflower crochet stitches, this stitch will not come out. So if you know what really is the name of this stitch then comment below so that I can properly name this stitch also.
Materials:
Lily Sugar and Cream Kitchen Breeze
H hook/ 5 mm
G hook /4mm
Tapestry needle for weaving ends
Scissors
Buttons
Cloth for lining
IPAD PURSE:
Chain 80 plus 1 or multiples of 2 plus 1. Slip stitch on the first stitch to join.
R1. Chain 1, Half Double Crochet (HDC) all the way around and slip stitch on top of the first HDC.
R2. Yarn over, insert hook on the first stitch , pull up a loop (you'll
have 3 loops on your hook) insert hook unto the next stitch and pull up a
loop again (4 loops on hook).Insert hook unto the next stitch
again then pull up a loop (5 loops on hook) then yarn over and pull
through all loops. *Chain 1. Yarn over, insert hook on the same stitch you last worked on, pull up a loop (you'll
have 3 loops on your hook) insert hook unto the next stitch and pull up a
loop again (4 loops on hook).Insert hook unto the next stitch
again then pull up a loop (5 loops on hook) then yarn over and pull
through all loops* Repeat this until the end. Ending with Chain 1. Slip stitch on the first Chain 1.
R3. *HDC 2 in Chain 1 space from the previous round(do not chain 1 first HDC 2 directly). * Repeat this to end. This will create a flower like stitch.
If you don't understand what I am trying to say here. Watch this video from Interunet. This is how it is done.
R4-R15. Repeat R2 and R3. If you want to continue or you cant to make a bigger purse you can continue doing this ending with R3.
R16. Chain 1. SC in first stitch. SC all the way around. Turn.
R17- R18. Repeat R16.
R19. Chain 1, Skip the first stitch and SC all the way around. Turn. (This will decrease the stitches)
R20. Chain 1 SC in first stitch and SC all the way around. Turn.
R21-30. Repeat R19 and 20.
R31. Chain 1, Skip the first stitch and SC 11, chain 5 and skip 5 stitches (this will be your buttonhole). SC till the end. Turn
R33. Chain 1, Skip the first stitch and SC all the way around. When you reach to the Chain 5, SC 5 also in chain 5. Turn.
R32. Chain 1 SC in first stitch and SC all the way around. Do not turn. Continue to SC all way down to the edges until you come back to the first stitch of R32. Slip stitch in Chain 1 and fasten off. Weave all ends.
For the bottom part. You can either sew it together or you can closed it with single crochet. SC the the back and the front together.
Cellphone Pouch
Grab your G hook
R1. Chain 13. 2 SC in second chain from the hook. SC 8, 5 SC in last chain. Continue to SC on the other side of the Chain13. SC in next stitch and to the next 7 SC. 3 SC in last stitch where the first 2SC is. Slip stitch in first SC. You will have a total of 30 SC all the way around.
R2. Chain 1, Half Double Crochet (HDC) all the way around and slip stitch on top of the first HDC.
R3. Yarn over, insert hook on the first stitch , pull up a loop (you'll
have 3 loops on your hook) insert hook unto the next stitch and pull up a
loop again (4 loops on hook).Insert hook unto the next stitch
again then pull up a loop (5 loops on hook) then yarn over and pull
through all loops. *Chain 1. Yarn over, insert hook on the same stitch you last worked on, pull up a loop (you'll
have 3 loops on your hook) insert hook unto the next stitch and pull up a
loop again (4 loops on hook).Insert hook unto the next stitch
again then pull up a loop (5 loops on hook) then yarn over and pull
through all loops* Repeat this until the end. Ending with Chain 1. Slip stitch on the first Chain 1.
R4.
*HDC 2 in Chain 1 space from the previous round(do not chain 1
first HDC 2 directly). * Repeat this to end. This will create a flower
like stitch.
R5-15. Repeat R2 and R3.
R16. SC 12. Chain 16 (Loop for button). SC in same stitch and SC all the way around. Slip stitch in first stitch. Fasten off and weave all ends.
Attached all buttons and you are done. You can line the Tablet Purse if you want. I did line my tablet purse but not the cellphone pouch. Here's another look on a different background.
So that's it. I hope you enjoy this post. If you have any questions or
suggestions kindly leave a comment below. I'll be glad to answer them.
Thank you very much.
xoxo Nanay Madel
Don't
forget to share on facebook, pinterest , twitter and more... Please
bear with my pictures, I just took them using my phone. Thanks!
**Please do not copy and post this pattern and claim it as your own.
Please do not re-publish all photos from this blog as your own. You may
make and sell products from my pattern. Please also link back to my
post. Any link back will be much, much appreciated.Thank you very much.
**
I always make sure to share also because I learn crochet for
free and I got all of my patterns from all over the internet from some
very generous bloggers. So please also click the links and support the
bloggers.