

I made this bag using the Solid Granny Squares. Granny squares are so versatile, I love how I can turn it into anything else. That's why I believe that Granny Squares are the basic in crochet. It never goes old.
Materials
- Any type of yarn (with mine I used Gantsilyo Guru's Light Milk Cotton #3 yarn)
- Tapestry needle
- Cords for the handle
- Scissors
- Cloth for lining (optional)
Terms Used
- CH - chain
- SC - Single Crochet
- DC - Double Crochet
- Mattress Stitch - The stitch I used in joining the squares. Click the link and you'll be directed to a video on how to do the mattress stitch.

\ Instructions.
1. Make 10 Solid Granny Squares. On how to make the Solid Granny Squares click here. Block the squares nicely. For some ideas on DIY blocking station or on how to block your squares, I recommend the 3 links below, although there are so many options out there, I find these 3 to be easy to follow.
- Crochet Pixel Square Blocking (docking) Station
- Modular Crochet Blocking Station
- DIY Blocking Station for Crochet Squares
2. After all the blocking. Arrange your squares as shown below. I choose to have two colors for my bag. I did not intend it to look this way, I just made 5 black squares and 5 orange gold. Then when I lay them out I could not decide where my blacks should go or where the orange squares should go. I should have just made 4 black and 6 orange or vice versa. But then I am too lazy to make more or change the colors because I was also adamant for the bag to be done. But then when I look at it, it's not that bad, in fact, I like it even more. So it's up to you if you want the colors to be like mine or not, you can even make it also in one color. I did think of that also and I'd prefer the black color, but I don't think I can work with black yarn. So that's how I ended up with the colors of my mini bag.
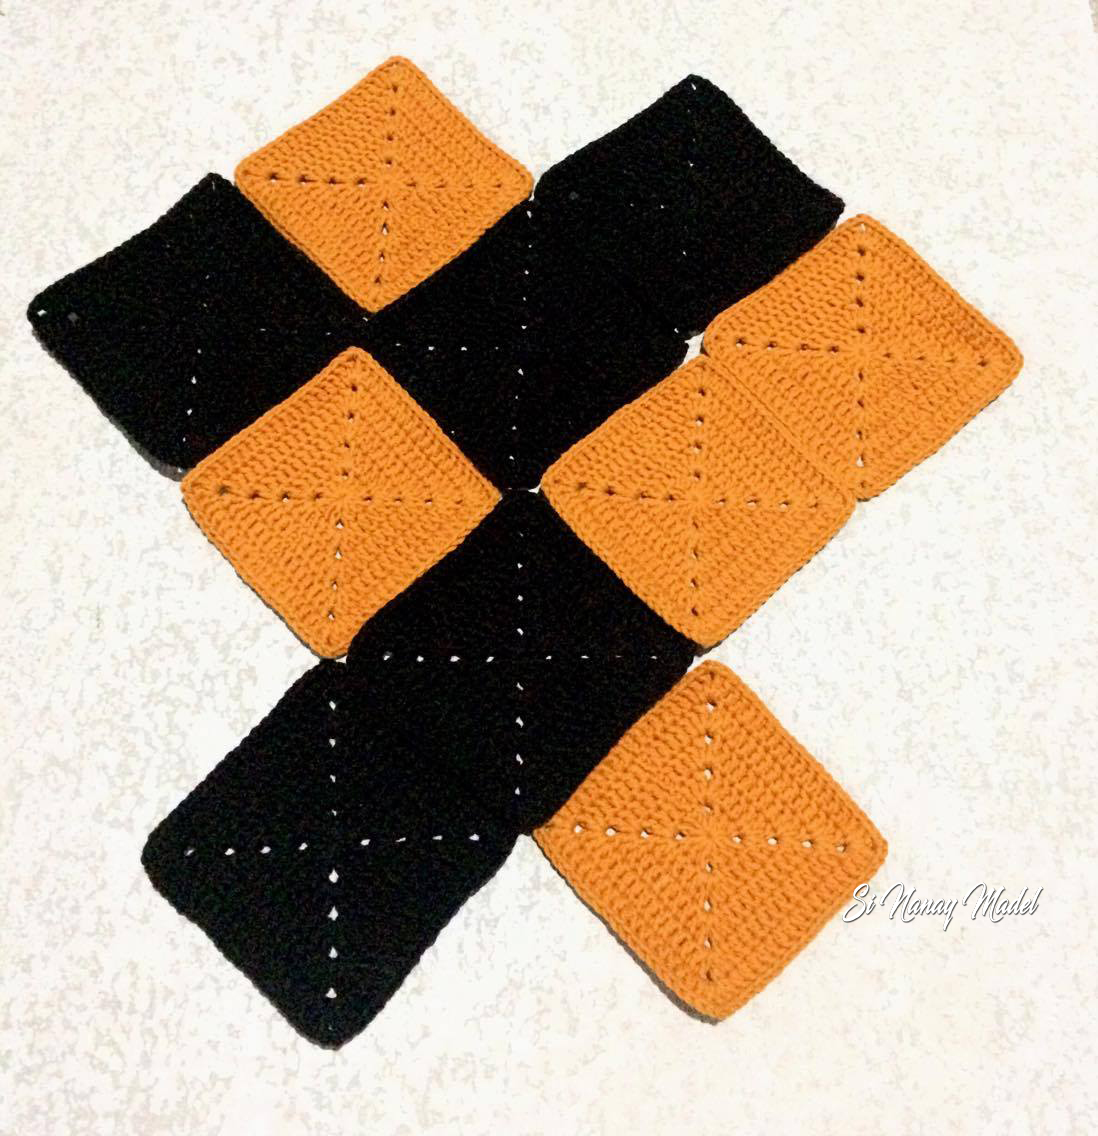
Then join the squares using Mattress Stitch. I joined the squares using the mattress stitch but I only sew through the back loops only. Join all squares across following the red arrow below. Do not join them one by one and cut your yarn after each join. Join them continuously until all the squares in that line are joined together, then proceed to the next line of squares.

After all the squares are joined in that direction, then sew on the other side following the red arrow below.

Now fold it in half following the white dotted lines as the center. Align the red dots when folding, that will be the opening of your bag.

DO NOT sew the opening, the one with red arrows below.

Weave all your ends and let's make the handle. I added cords inside the handle to prevent it from stretching too much.
Handle
1. Measure the cord up to 23 inches. But if you want a longer cord it's up to you. Then burn the ends of the cords a little to prevent the cords from splitting.
2. Attach the cords as shown in the pictures below. Attach it to the second hole.


And sew both ends of the cord.

Let's make the handle itself. Make 2
R1. CH3, SC in the 2nd CH from the hook. CH1 and turn. (2sc)
R2. 2 SC in first CH, 2 SC in last. CH1 and turn (4 SC)
R3. 2 SC in first, 1 SC in each of the next 2 stitches, 2 SC in last. CH1 and turn. (6 SC)
R4. 2 SC in first, 1 SC in each of the next 2 stitches, 4 SC in last. CH1 and turn. (8 SC)
R5-R37. SC in each stitch until the end. CH1 and turn. (8SC)
R38. SC decrease, 1 SC in each of the next 4 stitches, SC decrease. CH 1 and turn. (6SC)
R39. SC decrease, 1 SC in each of the next 2 stitches, SC decrease. CH 1 and turn. (4SC)
R40. SC decrease, SC decrease. CH 1 and turn (2SC)
R41. SC in each stitch. (2SC). Leave a long tail for sewing. Fasten off and weave in ends.
Then attach the handle as shown in the pictures below.


Sew closed the handle using a tapestry needle and yarn.

Then let's cover that ugly part where you attached your handles.
Make 4
R1. CH3, SC in the 2nd CH from the hook. CH1 and turn. (2sc)
R2. 2 SC in first CH, 2 SC in last. CH1 and turn (4 SC)
R3. 2 SC in first, 1 SC in each of the next 2 stitches, 2 SC in last. CH1 and turn. (6 SC)
R4. 2 SC in first, 1 SC in each of the next 2 stitches, 4 SC in last. CH1 and turn. (8 SC)
R5-R6. SC in each stitch until the end. CH1 and turn. (8SC)
R7. SC decrease, 1 SC in each of the next 4 stitches, SC decrease. CH 1 and turn. (6SC)
R8. SC decrease, 1 SC in each of the next 2 stitches, SC decrease. CH 1 and turn. (4SC)
R9. SC decrease, SC decrease. CH 1 and turn (2SC)
R10. SC in each stitch. (2SC). Leave a long tail for sewing. Fasten off and weave in ends.
Attach them to the insides of your bag where you attach the handle before. The picture below shows what it looks like after sewing them. It will leave a clean finished to your bag.

Then line your bag with a cloth. It will make add life to your bag. It will prevent the bag from stretching too much.
And your bag is done. The bag measures 11 inches to a foot wide and 7-8 inches long excluding the handles. I found this pin on Pinterest on how to arrange your granny squares. It really is very helpful. You can make a small bag or a big bag, it includes also how many squares to make. Hope this will be useful to you also.
That's it, I hope you all learn something and enjoy this post. If you have any questions, comments or suggestion just leave a message in the comment box and I will gladly answer them
Hope you enjoy making this project and don't forget to Tag me on Instagram and Twitter with your finished project and also like my Page in Facebook, Si Nanay Madel. I would love to see what you've done and Pin it also on Pinterest.
Thank you and God bless!
xoxo
Nanay Madel
Don't forget to share on Facebook, Pinterest, Twitter and more.
**Please do not copy and post any pattern from this blog and claim it as your own. This pattern is limited to personal use only. Please do not re-publish all photos from this blog as your own. You may make and sell products from my pattern. Please also link back to my post. Any link back will be much, much appreciated. Thank you very much. **
I always make sure to share also because I learned to crochet for free from some very generous bloggers
Thought of the Day
October 4, 2017
Never lose sight of the fact that you belong to God, that He has bought you with a price. - CM 53
No comments:
Post a Comment